
Introduction
This project will build on your knowledge of CSS-fu.
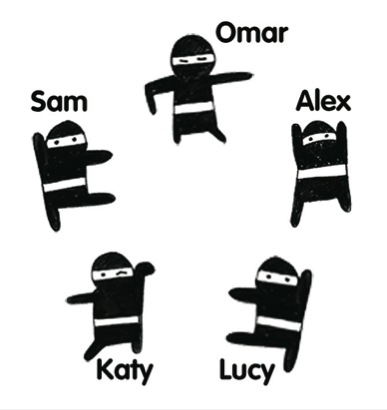
Five ninjas arrived in town and need to hide before anyone notices them. Using your own ninja-like CSS skills to get them into a safe spot. You can move the ninjas themselves, and some of the objects in the street too. Quick! There is no time!
Step 1: Meet the ninjas
- Open up the file called
ninjas.htmlin the code editor. Open it up in the browser as well. - Read through the code. Can you guess which parts correspond to what objects in the street? Notice that we are using two languages: HTML to add all elements to the page, and CSS placed between the
styletags. - The elements we will be playing with are the images (
<img>tags). We can control their position using CSS.
Let’s move a ninja
- Each one of the ninjas is named using the
idattribute. Let’s move Alex The Ninja first. Find Alex’s corresponding CSS rule. - Change the value of
leftto100pxandtopto320px. Whenpositionproperty is set toabsoluteit means we will be describing the position in relation to ninja’s parent element - in this case the<div>withidstreet_corner.pxmeanspixel.leftdescribes how far to move the ninja from the left edge (by how many pixels), andtoptells the browser how far to move it down from the top edge. - Change
lefttorightandtoptobottom. Now your code tells the browser to put the ninja a100pxto the left of the right edge, and320pxup from the bottom edge.
Pixels describe the smallest physical point your monitor can display. They are often used to describe the screen dimensions.
Step 2: Let’s try to describe it differently
Now you know how to use pixel positioning. This isn’t the only way we can describe the positions on the screen, so let’s look at some other options we have.
- Find the
wheelie_binelement in the CSS.
100% describes the full width of the available screen space. As we are positioning ninjas and other object in relation to the street_corner, which is 600 pixels wide, in our case 100% will equal 600px. If we were to draw a bigger street corner, for example 800px wide, then 100% would mean 800px. Depending on context, sizes described in percentages will have different meanings.
Step 3: One more unit type
As if we didn’t already have enough unit types, we will try another one! You know how to use pixels and percentages, so now let’s try ems.
Em is a measurement type borrowed from the field of typography , which concerns itself with the appearance of letters and text. One em is equal to the current font size. Notice that at the top of the CSS we set font-size on the body element to 20px, so one em will appear as 20 pixels.
- Find the
bicyclein the CSS. Apart from theembit it should be familiar to you. See if you can move the bicycle to hide Sam The Ninja. - We’ve mentioned that the size of the
emis based on the font size. To see it in practice, findbodyin the CSS. Change thefont-sizevalue to 30px. What happened? Because now eachemis 30 pixels wide and 30 pixels tall all elements using this measurement have shifted their position!
Step 4: Quick, hide the ninjas!
Now that you know how to move the elements on the screen it’s time to help the ninjas. Use different ways of describing their position. Remember, you can also move some of the objects. Which unit do you feel most comfortable using? Find the best way to provide the best hiding. Good luck!
Things to try
- Can you figure out how to make ninjas appear in front of some of the street objects? What would happen if you copied the
<img>tag for the ninja after the<img>tag that displays the object? - Can you add some more objects to the scene? You could add images from your computer or ones you find on the internet.